
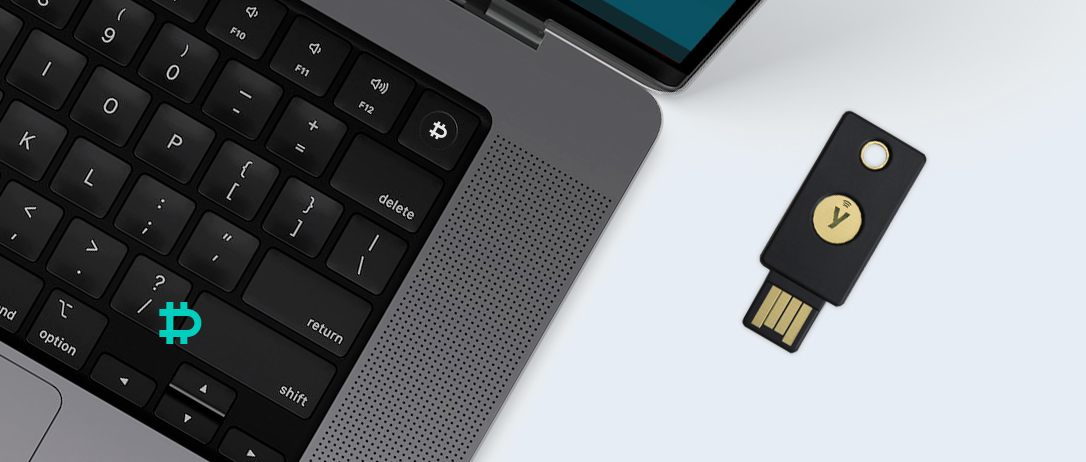
We are taking another step towards an even more secure environment for our users by introducing the strong YubiKey authenticator.
Setting up your YubiKey
Firstly, if you don’t yet have a YubiKey but are considering purchasing one to secure your Deribit account, make sure you get one that has the right connection for the devices you intend to use it with. Personally I’ve gone with the Yubikey 5 NFC, because it is able to connect via both USB and NFC, so I can use it with my PC and phone with ease.
If it’s your first one, then once your security key arrives, you may wish to quickly head over to the Yubico website, and watch the two minute setup video. The web address is written on the packaging. This is purely informational, and isn’t necessary to get started on Deribit, so if you’re already familiar with security keys you can skip this step and head straight to the Deribit website.
Adding a new YubiKey on Deribit
To get your YubiKey set up for use on Deribit, while logged into the Deribit website, go to the top right menu.
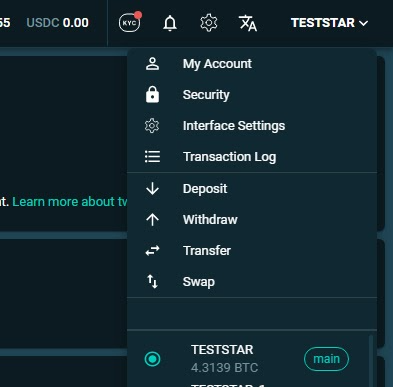
Click ‘Security’ and this will take you to the security settings page.

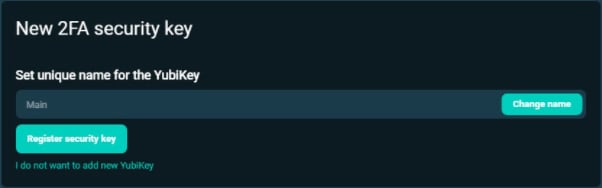
Click ‘Add New Yubikey Security Key’ and then give your key a name.
You can choose any name, but bear in mind the naming may be useful if you set up multiple keys. For example you may wish to set up a main key and a backup key, or give separate keys to different employees.
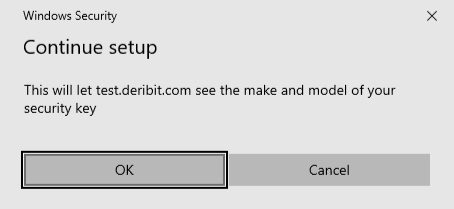
Do not insert your key into your USB port yet. There will be a prompt shortly to let you know when it is time to do so. Once you’ve named the key, click ‘Register security key’. Your operating system will prompt you to set up a security key and then to let the Deribit website use your security key.
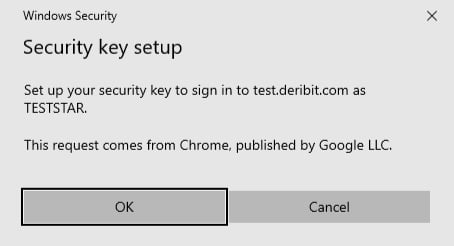
Click OK to both of these.
You will then be prompted to insert your YubiKey.
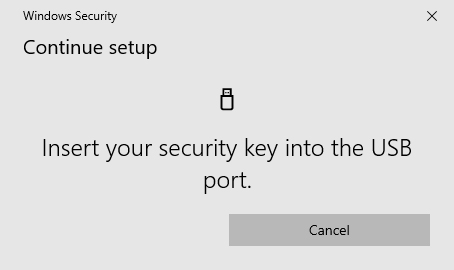
Once you have inserted the YubiKey into the USB port, a pop up will ask you to touch the button on your key. Touch the button and this will register the key for use in your Deribit account. If this is the first key you have added to your Deribit account, it will automatically be assigned to all actions, including:
- Account management
- Signing in
- Wallet management
Whichever key is assigned to account management is considered the master key. This is needed to reset or add new keys. Users can log in to their account with a key that is assigned to ‘Signing In’. And wallet operations such as withdrawing or adding new withdrawal addresses will require a key that is assigned to ‘Wallet Management’.
Once a key has been registered, 2FA status will change to ‘Enabled’ (if it wasn’t already), and a new ‘Management mode’ setting is enabled. By default this is set to basic, which is designed for accounts where only a single person has access. In basic mode you can have multiple keys, however you can only assign one key to each action. For example you could set up one key for login and account management, and a second key for wallet actions.
For those who need a bit more flexibility though, such as trading teams of more than one person, it’s possible to switch to advanced mode, which then allows multiple keys to be assigned to the same action. This way it’s possible for the account owner to give members of their team access to certain functions via separate keys, but the account owner will retain the sole ability to edit 2FA settings with the master key.
Using multiple security keys
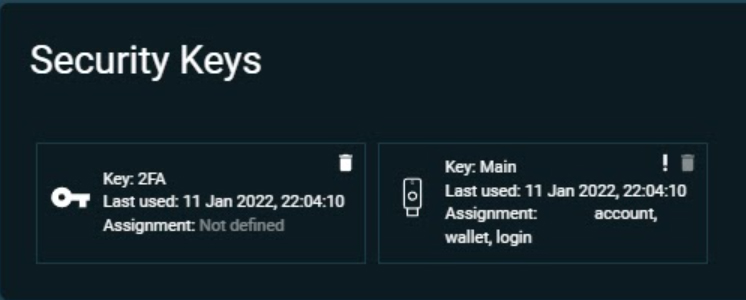
One very useful feature of the new security key implementation, is the ability to have multiple keys added to a single account. It is also possible to add a mixture of 2FA app keys (for example the Google Authenticator app) and Yubikeys. Once added, these keys can be assigned to whichever tasks are appropriate for that key.
To show an example, let’s now add another key to the account, but this time via the Google Authenticator app. To do so click ‘Add new 2FA security key’ and then give it a name. This will lead to this screen which allows you to set up the 2FA key in an authenticator app on a smartphone.
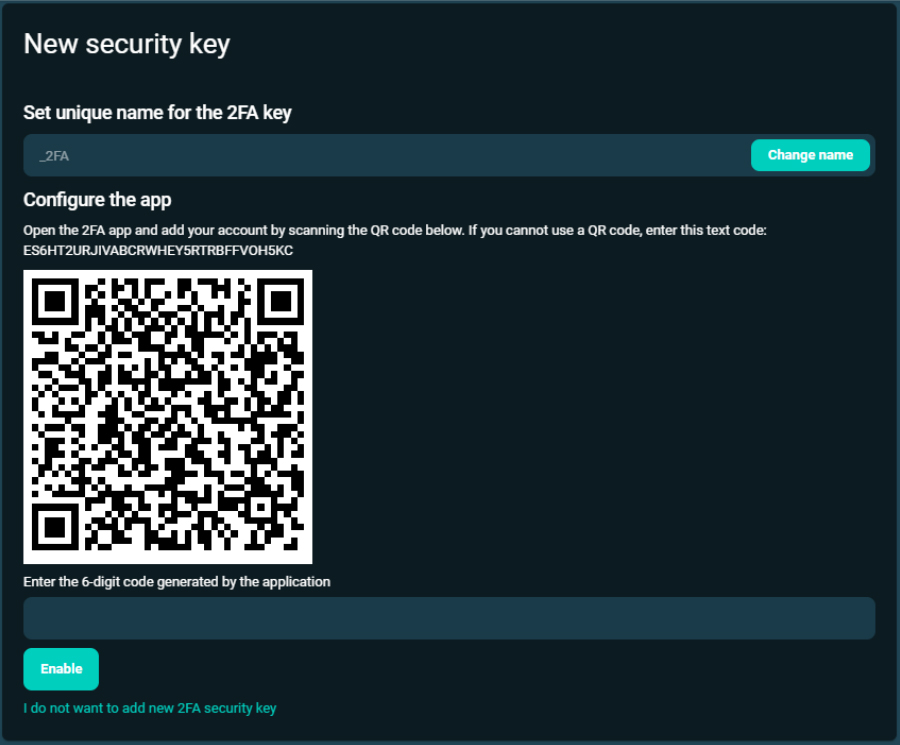
Inside the Google Authenticator app, scan this QR code, which will add the code generator to the app. Then enter the current code, and click enable.
If the account already has the Yubikey set up on the account as the master key, after clicking enable, you will also need to confirm this action on your Yubikey as well.
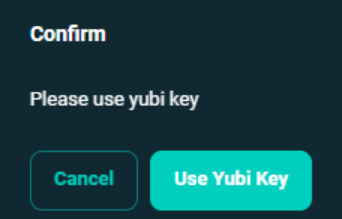
To do so plug the Yubikey into your device, and touch the button when prompted. Once this is done the new 2FA key will be added to the account. You should see them both listed like this.
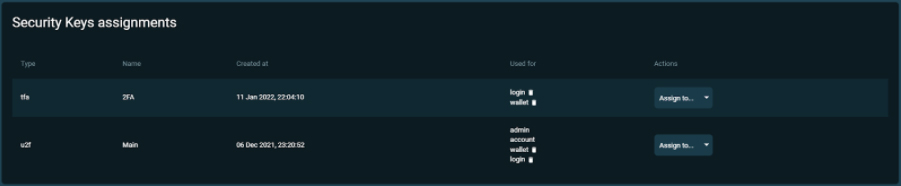
If you switch into advanced mode in the top left, you will then see the key assignments table listed like this.
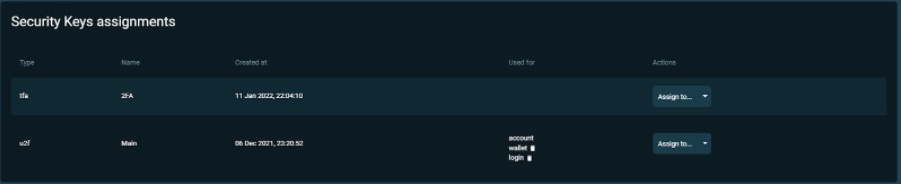
When you switch to advanced mode, instead of listing each of the assignments and having the option to assign a single key to each of them, the table will instead show a list of the keys with the ability to select multiple assignments for each key. Advanced mode also allows several keys to have the same action assigned to them. For example you could have 2 keys that have wallet access.
You can add assignments to the new 2FA key by using the drop down menu. For example you may wish to give this second key the ability to log in, and to withdraw. So you would assign the ‘login’ and ‘wallet’ actions to this key. It will then appear in the list like this.
This feature can be used by individuals for backups etc, but it is even more useful for companies with multiple employees who each only need access to certain actions within the account. For example you may have an employee who needs access to trading, but you don’t want them to be able to withdraw any funds. To achieve this you would not assign them the wallet action.
This security key implementation gives you the ability to:
- Add multiple keys
- Assign different keys to different actions
- Assign multiple keys to the same action, and
- Use a mixture of 2FA apps and Yubikeys
This allows for great flexibility in how you secure your account. Each employee can be given access to the actions they need without having unnecessary access to actions they do not need.
Using your Yubikey to sign in to your account
As an example of how a Yubikey is used in practice to protect an account, let’s work through the process of signing in to a Deribit account. When you click ‘Log In’ you will be greeted with this form.
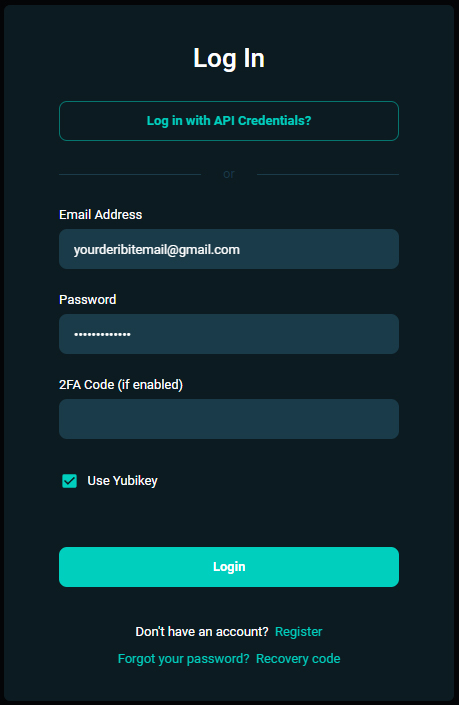
Enter your deribit email address and password as normal. In addition to this, be sure to check the ‘Use Yubikey’ checkbox, and then click ‘Login’.
This will lead to a prompt for you to insert your key into your device.
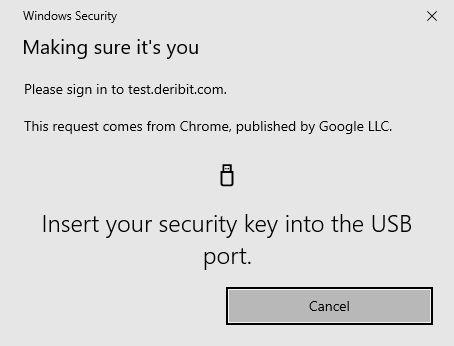
At this point you should insert your key, which will generate a prompt for you to touch the button on the security key.
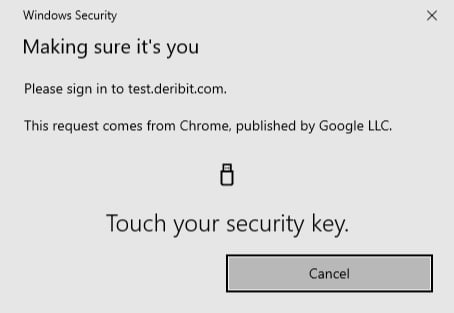
Touching the security key will authenticate your details and sign you into your Deribit account.
That’s it! It really is that quick and simple to use. The key just needs to be inserted into your device, and then pressed/touched to authenticate. This step means that to gain access to your account, someone needs both the login details (email and password) and physical access to the Yubikey. This makes your account much more secure, and almost impossible to hack.
All the usual security advice still applies though of course, so you should still be careful with your login details, and also with who has physical access to your Yubikey.
Visit Yubico to learn more about the product here.
AUTHOR(S)
We are the best resource for Crypto Derivatives trading. Deribit is not available in the United States or other restricted countries.